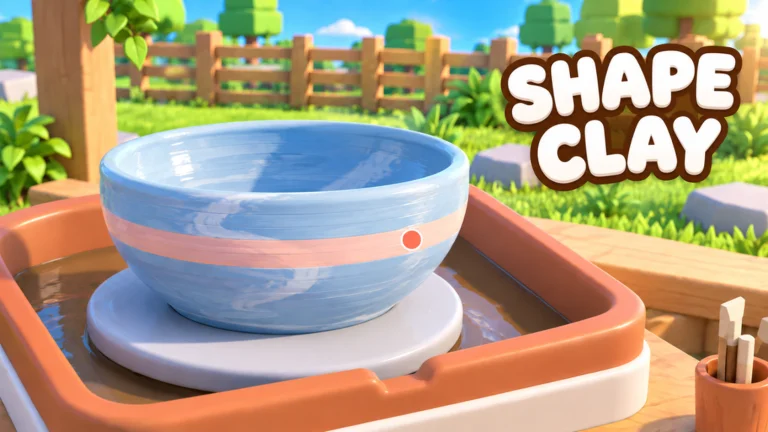
- Create Pottery shape clay by centering the piece on the Pottery Wheel before raising the walls
- Shape control: adjust the base, body, shoulder, and rim as separate zones
- Fix leaning early: correct an unstable silhouette before moving to Glaze
- Finish properly: glaze after shaping, then fire in the Kiln to complete the piece
- Better value: balanced, refined shapes support higher shop sale prices
Create Pottery Shape Clay: The Wheel Fundamentals
Shaping clay is the heart of Create Pottery. Every piece begins on the Pottery Wheel, and the habits you build during this stage decide whether your pottery sells well or ends up as a routine product. A centered, stable form is easier to decorate, easier to fire, and more attractive to customers in your shop.
The four zones you control:
| Zone | Role in the Shape | Common Mistake |
|---|---|---|
| Base | Foundation and visual weight | Making it too narrow for the body |
| Body | Main mass and silhouette | Uneven walls on both sides |
| Shoulder | Transition toward the neck | Thinning it before the body is done |
| Rim/Opening | Finished top edge | Uneven height viewed from angles |
Make gradual adjustments instead of changing the shape too quickly. Small corrections keep the clay centered and prevent the walls from leaning as the piece grows taller.
Step-by-Step: Shaping Your First Piece
Follow this sequence for consistent results. Each step builds on the previous one, so resist the urge to jump ahead to decoration before the form is stable.
Center the Clay on the Wheel
Place the clay on the Pottery Wheel and keep the form centered while the wheel spins. A centered start reduces uneven walls, leaning rims, and accidental distortion later in the process.
Build the Main Shape
Raise and shape the clay into your desired form. Control the base, body, shoulder, and opening as separate areas so the silhouette stays balanced from bottom to top. A wider base generally looks more stable.
Refine the Rim and Surface
Check the rim from multiple angles for uneven height. Remove bumps and sharp transitions from the outer wall, but preserve distinctive details if you are creating a decorative silhouette.
Apply Glaze
Add glaze and decorative elements to customize the piece. Inspect the entire surface before confirming, and choose a finish that supports the shape and intended value of the pottery.
Fire in the Kiln
Place the glazed pottery in the Kiln to complete production. The firing stage turns the prepared piece into a finished item that can be evaluated and sold through the pottery shop.
Glazing is not a substitute for correcting an unstable or poorly shaped form. Fix the shape first—small corrections before firing are far easier than repairs after decoration.
Common Shaping Mistakes and Fixes
Most failed pieces trace back to a handful of habits. Use this table to diagnose problems quickly and apply the matching fix before the piece reaches the Kiln.
| Problem | Likely Cause | Fix |
|---|---|---|
| Leaning silhouette | Shape corrected too late | Straighten the body before working toward the rim |
| Uneven walls | Clay not centered at the start | Re-center and make gradual adjustments |
| Rim looks tilted | Opening rushed | Check the rim from multiple angles before finishing |
| Wobbly appearance | Base too narrow | Widen the base before raising the body |
| Thin, fragile neck | Shoulder thinned too early | Complete the lower body before narrowing |
Beginner Habits
- Center first, always
- Gradual adjustments
- Wide, stable bases
Intermediate Habits
- Treat each zone separately
- Symmetry checks per step
- Plan the silhouette before starting
Advanced Habits
- Distinctive decorative forms
- Repeat proven shape-and-glaze combos
- Reserve rare clay for strong shapes
Repeat successful shape and finish combinations to build a reliable production routine. Consistency in shaping is what turns pottery making from trial and error into steady shop income.
Clay Choice and Shaping Value
The clay you place on the wheel affects the value of the finished piece. Match your shaping effort to the material so premium clay is not wasted on routine products.
| Tier | Clay Type | Best Use | Shaping Priority |
|---|---|---|---|
| S | Premium Clay | High-value pottery, premium runs | Take extra time refining the form |
| A | Rare Clay | Valuable pottery with good glaze capacity | Use selectively, careful shaping |
| B | Uncommon Clay | Regular income and progression | Standard shaping workflow |
| C | Common Clay | Early-game pieces, learning the wheel | Practice freely |
Reserve rarer clay for pottery with stronger selling potential rather than using it on routine pieces. Practice your shaping technique on common clay first.
Shaping Checklist and FAQ
Before You Fire, Verify:
- Clay is centered and the form is stable
- Base, body, shoulder, and rim are balanced
- Rim height is even from all angles
- Glaze inspected across the whole surface
- Best clay saved for highest-value pieces
Q: How do I shape clay in Create Pottery?
Place clay on the Pottery Wheel, keep it centered while it spins, then raise and shape the walls gradually. Control the base, body, shoulder, and rim as separate zones, refine the surface, then move on to glaze and kiln firing.
Q: Why does my pottery keep leaning?
A leaning form usually means the shape drifted before the lower body was complete. Correct the body first before working toward the rim, and make gradual adjustments instead of fast ones.
Q: Should I glaze before fixing the shape?
No. Glazing is a finishing step, not a repair tool. Fix the underlying shape first because corrections are much harder after the piece is glazed or fired.
Q: Does shaping affect sale price?
Yes. Balanced, refined shapes paired with suitable glazes tend to present better in the shop. Comparing finished pieces helps you identify which forms and finishes produce the best outcomes.