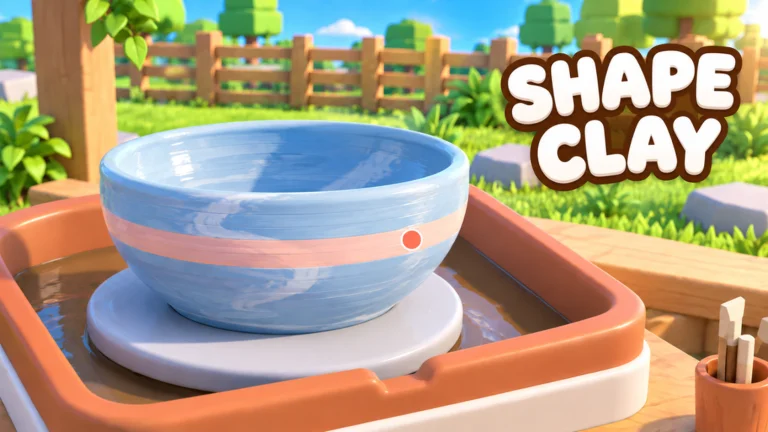
- Glazing in Create Pottery happens after shaping on the Pottery Wheel and before Kiln firing
- Finish the shape first: glaze is a finishing touch, not a repair tool for unstable forms
- Apply evenly so the piece has a consistent color after the firing stage
- Match glaze to value: use stronger finishes on pottery made from rare Clay
- Repeat winning combos to build a reliable, high-value production routine
How Glazing Works in Create Pottery
Glazing is the third stage of the core production loop in Create Pottery, the relaxing Roblox pottery simulator by Team Lychee. Every piece you sell follows the same path: collect Clay, shape it on the Pottery Wheel, apply Glaze and decorations, fire the piece in the Kiln, and sell it in your shop. The glaze step determines the final color and surface treatment of the piece, which directly affects how it looks on the shelf and how it performs as a finished product.
Think of glaze as the presentation layer of your pottery. A well-chosen finish supports the silhouette you built on the wheel, while a rushed finish on a poorly shaped form rarely saves the piece. Follow the workflow in order and treat each stage as a checkpoint before moving on.
Never use glaze to "fix" a bad shape. If the walls lean or the rim is uneven, go back and correct the form on the Pottery Wheel first — small corrections before glazing are far easier than repairs afterward.
Where Glazing Fits in the Production Loop
Before touching the glaze menu, make sure the earlier stages are complete. The table below shows the full workflow and what "done" looks like at each step.
| Stage | Tool | Your Goal | Done When |
|---|---|---|---|
| 1. Material | Clay storage | Pick the right Clay tier | Clay is ready at the wheel |
| 2. Shaping | Pottery Wheel | Build base, body, shoulder, rim | Form is stable and balanced |
| 3. Finishing | Glaze | Add color and surface treatment | Coverage is even, finish confirmed |
| 4. Firing | Kiln | Complete the production process | Piece becomes a finished item |
| 5. Selling | Shop | Convert pottery into income | Sale funds upgrades and materials |
Glaze Shapes the Look
- Adds final color and surface finish
- Customizes the piece before firing
- Improves presentation for shop display
Glaze Does Not Fix Forms
- Cannot repair a leaning body
- Cannot even out an uneven rim
- Shape corrections belong on the wheel
Glaze Affects Value
- Strong finishes suit rare Clay pieces
- Consistent coverage looks cleaner after firing
- Track which finishes sell best in your shop
Applying glaze before the shape is finalized is the most frequent beginner error. Once a piece moves toward the Kiln with an unfinished form and a confirmed glaze, you lose the chance to make easy corrections.
Step-by-Step: How to Glaze Pottery
Follow this sequence every time you finish a piece on the wheel. Consistency is what turns glazing from a gamble into a repeatable part of your production routine.
Inspect the shaped piece
Before opening the glaze options, rotate the piece and check the entire form. Look for uneven walls, a rim that leans to one side, or bumps on the outer surface. Fix anything you find on the Pottery Wheel now — this is the cheapest moment to correct mistakes.
Refine the rim and surface
Smooth the visible surface and finish the opening. Check the rim from multiple angles to catch uneven height, and remove sharp transitions along the outer wall. Preserve intentional details if you are making a decorative or unusual silhouette.
Choose a glaze that matches the piece
Pick a finish that supports both the shape and the intended value of the pottery. A stable, classic vessel benefits from clean, even finishes; experimental forms can carry bolder treatments. Reserve premium-feel finishes for pieces made from higher-tier Clay.
Apply the glaze evenly
Work around the whole piece so coverage stays consistent. Uneven application shows up clearly after firing and can make an otherwise solid piece look rushed. Inspect the full surface one more time before confirming the glaze.
Confirm and move to the Kiln
Once the glaze is confirmed, the piece is ready for firing. Only start the Kiln stage when both the shape and the finish are complete — the Kiln turns the prepared piece into a finished, sellable item.
Review the fired result
After firing, compare the finished piece against your previous runs. Note which shapes and glaze combinations produce the best shop outcomes, and repeat those pairings to build a dependable, higher-value production routine.
Keep a simple mental (or written) list of shape-and-glaze pairings that sold well. Over a full production cycle, these notes tell you which combinations deserve your rare Clay and which are fine for routine stock.
Glaze Strategy by Progression Stage
The right glazing approach changes as your studio grows. Early on, speed and consistency matter more than perfection; later, glaze decisions become a value multiplier on rare materials.
| Stage | Clay Focus | Glaze Approach | Why It Works |
|---|---|---|---|
| Early Game | Common Clay | Simple, fast, even finishes | Learn the workflow, keep cash flow steady |
| Mid Game | Uncommon / Rare Clay | Selective finishes on better pieces | Reinvest sales into production upgrades |
| Late Game | Rare / Premium Clay | Premium finishes on high-value runs | Maximize return on scarce materials |
Reserve rare Clay for pottery with strong selling potential rather than routine pieces. Pairing premium material with a rushed glaze wastes the biggest value lever you have — finish those pieces carefully.
Glazing Checklist and Production Goals
Run through this checklist every session to keep your glaze quality consistent while production scales up.
Before You Fire:
- Shape is stable, balanced, and rim is even
- Outer surface is smooth with no unwanted bumps
- Glaze choice matches the piece's shape and target value
- Coverage is even across the entire piece
- Rare Clay pieces got extra review before confirming glaze
- Previous best-selling shape-and-glaze combos were repeated
FAQ
Q: When should I glaze pottery in Create Pottery?
Glaze after the piece is fully shaped and refined on the Pottery Wheel, and before firing it in the Kiln. Glazing is the finishing stage — the shape must be final first, because glaze cannot fix a leaning body or an uneven rim.
Q: Does glazing affect the value of my pottery?
Glaze determines the final color and surface treatment, which shapes how the piece presents as a finished product. Pairing a strong finish with high-tier Clay and a good form supports higher selling potential, so treat glaze as a value multiplier rather than a repair tool.
Q: What is the most common glazing mistake?
Confirming a glaze on an unfinished form. Uneven walls and rims should be corrected on the Pottery Wheel before glazing. The second most common mistake is uneven coverage — inspect the entire piece from multiple angles before confirming.
Q: Which pieces deserve my best glazes?
Save your strongest finishes for pottery made from Rare or Premium Clay and for shapes that have sold well in your shop. Use quick, even finishes on common-Clay stock pieces to keep early-game cash flow steady.