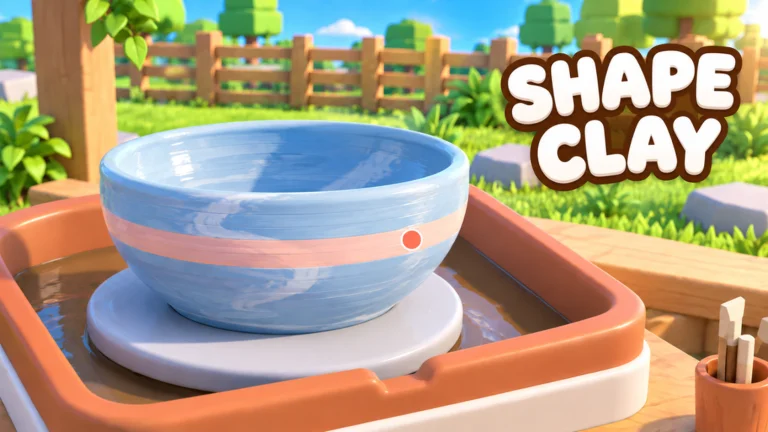
- Create Pottery glaze colors decide the final look of every piece after kiln firing
- Apply glaze after shaping, before firing — glaze cannot fix a bad form
- Match glaze color to pottery shape and rarity for better sale value
- Save rare or premium glaze finishes for high-value Clay pieces
- Test combos in repeated production runs to find your shop's best sellers
How Glaze Colors Work in Create Pottery
Glaze is the finishing stage that gives each piece its final color and surface treatment. In the standard Create Pottery workflow — Clay, Pottery Wheel, Glaze, Kiln, Shop — glaze sits between shaping and firing, which means your color choice is locked in once the piece enters the Kiln. Understanding how color interacts with shape, Clay tier, and firing helps you make pieces that sell consistently in your shop.
The key principle: glaze enhances a piece, it does not rescue one. A well-shaped vessel with an even, deliberate glaze application always presents better than a poorly shaped piece with an expensive finish.
| Stage | What You Do | Impact on Glaze Result |
|---|---|---|
| Shaping (Wheel) | Build base, body, rim | Determines how color reads across the surface |
| Glazing | Select and apply color finish | Sets final appearance before firing |
| Kiln | Fire the glazed piece | Locks in the color permanently |
| Shop | Sell finished pottery | Value reflects shape + Clay tier + finish |
Inspect the entire piece from multiple angles before confirming the glaze. Uneven attention at this stage is the most common reason a finished piece looks rushed after firing.
Glaze Color Categories and What They Suit
Different glaze colors and surface finishes read differently depending on the silhouette of the pottery. Use these pairings as a starting framework, then refine based on what actually sells in your shop.
Warm Tones (Terracotta, Amber, Gold)
- Natural, earthy look
- Suits rounded vases and classic bowl forms
- Safe choice for routine shop sales
Cool Tones (Glaze Blue, Teal)
- Clean, polished look
- Suits tall, narrow vessels and modern silhouettes
- Strong contrast against warm studio lighting
Dark & Contrast Finishes
- Bold, premium look
- Suits decorative or unusual silhouettes
- Best reserved for higher-value Clay pieces
| Color Family | Best Shape Match | Recommended Clay Tier | Typical Use |
|---|---|---|---|
| Warm earth tones | Bowls, rounded vases | Common / Uncommon | Routine income |
| Glaze blue / teal | Tall vessels, bottles | Uncommon / Rare | Mid-game sales |
| Gold accents | Decorative pieces | Rare | Higher sale value |
| Dark contrast finishes | Experimental forms | Rare / Premium | Late-game premium runs |
Avoid treating a premium glaze as a substitute for correcting an unstable or poorly shaped form. Fix the silhouette at the wheel first — the glaze stage cannot repair a leaning rim or uneven walls.
Step-by-Step: Glazing a Piece Correctly
Finish the Shape First
Complete the form on the Pottery Wheel, refine the rim, and smooth the surface. Small corrections here are far easier than repairs after glazing or firing.
Review the Silhouette
Check the piece from multiple angles. Decide whether the form calls for a warm, cool, or contrast finish based on its shape and the Clay used.
Select the Glaze Color
Choose a finish that supports the shape and intended value of the pottery. Match premium finishes to rare Clay, not routine pieces.
Apply Evenly and Inspect
Apply the finish consistently so the color reads evenly across the whole surface, then inspect the entire piece before confirming.
Fire in the Kiln
Only start firing when both the shape and glaze are complete. The Kiln locks the finish in permanently.
Evaluate the Result and Repeat
Compare sale outcomes across different shape and glaze combinations. Repeat your best-performing combos to build a reliable production routine.
Track which form-plus-glaze combos sell best in your shop. Repeating proven combinations builds a dependable income stream faster than random experimentation.
Glaze and Clay Tier Strategy
Glaze decisions should follow your Clay tier list. Spending a premium finish on Common Clay wastes value, while firing Rare Clay with a careless color choice leaves money on the table. Use the table below to align glaze effort with material value.
| Clay Tier | Rarity | Glaze Approach | Priority |
|---|---|---|---|
| S — Premium Clay | Highest | Premium or gold finishes, deliberate color choice | Save for high-value runs |
| A — Rare Clay | High | Strong cool tones or contrast finishes | Use selectively |
| B — Uncommon Clay | Medium | Standard warm or blue glazes | Process regularly |
| C — Common Clay | Low | Simple, quick finishes | Spend freely |
Production planning tips:
- Reserve rare glaze finishes for pieces with genuine selling potential, not routine output.
- Keep a stockpile of Clay before starting a glazing session so production and finishing stay in rhythm.
- Plan the firing order when processing several pieces so the Kiln never sits idle.
Combine glazing sessions with active phone Jobs. Many production objectives count pieces you are already finishing, so one session can advance glaze practice, shop inventory, and Job rewards at the same time.
Turning Glaze Colors into Shop Income
Once your glaze choices are consistent, the shop converts finished pieces into income. Reinvest early profits into production capacity and sales efficiency so better-glazed pottery actually reaches customers faster.
| Progression Stage | Glaze Strategy | Income Focus |
|---|---|---|
| Early Game | Simple, consistent finishes on Common Clay | Build dependable cash flow |
| Mid Game | Better finishes on Uncommon/Rare Clay | Reinvest in shop operations |
| Late Game | Premium finishes, repeat best combos | Multiple income channels with employees |
Glaze Mastery Milestones:
- Glaze ten pieces with even, consistent color application
- Identify your shop's three best-selling shape-and-glaze combos
- Reserve all Rare and Premium Clay for deliberate glaze choices
- Fire only fully refined shapes — never glaze over flaws
- Reinvest sale profits into production and sales upgrades
Direct early glaze-driven profits toward upgrades that remove your biggest workflow bottleneck — usually production capacity or sales efficiency — before cosmetic spending.
FAQ
Q: When should I apply glaze in Create Pottery?
Apply glaze after the piece is fully shaped on the Pottery Wheel and before it enters the Kiln. Glaze adds the final color and surface treatment; it cannot repair a poorly shaped form, so refine the shape and rim first.
Q: Do glaze colors affect pottery sale value?
Sale outcomes reflect the combination of shape, Clay tier, and finish. A deliberate, well-matched glaze on high-value Clay generally presents better and supports stronger sales than a careless finish. Track which Create Pottery glaze colors sell best in your own shop and repeat those combos.
Q: Should I use premium glazes on Common Clay?
No. Reserve rare or premium finishes for Rare and Premium Clay pieces with genuine selling potential. Use simple finishes on Common Clay for routine income and practice.
Q: Can I change the glaze after firing?
No. The Kiln stage locks the glaze in permanently and turns the piece into a finished item. Inspect the entire piece from multiple angles before confirming the glaze and starting the fire.